
How to Texture a Wall With a Roller
Texturing a wall is a great idea to transform a dull look into a visually appealing look. You can hide any imperfections in the wall with the help of texturing the wall. It will help you in saving from the trouble of doing a dozen little repairs. It is popularly known for home improvement. Now you must be wondering how to texture a wall with a roller? Or how to texture drywall? Here is an article to help you.
Wall texture has a wide range of benefits like it is a quick method to finish walls without including the cycles of mudding, curing, and sanding the compounds of drywall.
Wall texture is highly beneficial to cover up a drywall or mudding work. In addition to this, it dries rapidly, and you can begin the painting work just hours later.
How Does a Wall Texture Works?
Wall texture is thinner as compared to the pain and is thinner than the drywall compound.
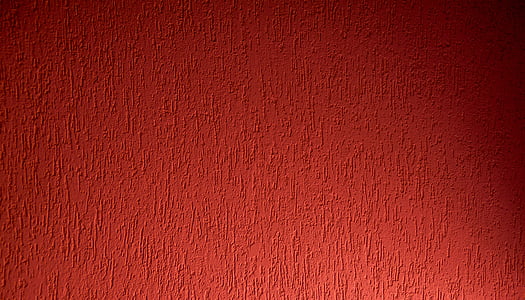
When the texture is applied to ceiling and walls, it leads to the formation of small shadows due to depressions and bumps.
These shadows disappear in the direct light; however, their length increases when the sources of light move at a sharper angle. It leads to the darkening of the overall shade, which in turn darkens the wall slightly.
This darkening of the wall contributes to hiding the imperfections that are present in the wall.
If your drywall contains depressions, bulges, seams, or other imperfections, then wall texture is a perfect choice.
This is the reason for ceiling texture. Ceilings receive light, and it becomes difficult to hide the imperfections present in them.
Issues Related to Wall Texture
The effects of wall texture can vary on the basis of how the material is applied on the wall and how it is rolled.
You should practice the techniques on even sheets of cardboard or scraps of drywall before you begin to texture your ceiling or walls.
You practice using both heavy and thin coats. In addition to this, you should also try different drying times before applying multiple coats.
In case if you have any problem with your wall texture, then it might be due to the portion of water to the compound of drywall. If the water is less, then it might yield sharp-peaked and sticky textures.
On the other hand, if there is too much water, then it would lead to peaks that do not hold. It might also lead to water dripping down the drywall.
Required Things
| Materials | Equipment |
| Drywall compound Painter’s tape Paint Drywall primer of flat paint | Drop cloth Drywall knife Plastic sheeting Paint tray Paintbrush 5-gallon bucket Paint roller and cover Drill Paint mixer attachment |
Instructions
Below mentioned are some instructions associated with how to texture a wall with a textured paint roller.
Cover the Area
Texturing is a little bit of a messy option, which leads the wet texture material to fly in all directions. Therefore, while stippling drywall or ceiling, you should cover the adjoining wall surfaces, floors, window trim, and door.
You should use drop cloths for the purpose of covering the floor and plastic sheeting to cover vertical surfaces and hang it using painter’s tape.
Patch the Surfaces
It is essential to patch the ceiling and wall surfaces before applying the stipple texture.
First of all, you should patch chips of holes using lightweight spackle or drywall compound.
In order to force the drywall compound into the hole, you should use a drywall knife.
The next step is to wipe it using an edge of the knife. It will help in smoothing the compound over the entire surface.
You do not need to spend too much time on patching the surface, as wall texture will get it covered.
PRO TIP
It is not necessary to sand the surface; you can simply smooth it using a drywall knife.
Prime the Surface
The next step is to apply a layer of drywall primer or white latex paint. Allow it to dry. It is essential to prime the surface.
If you directly apply the paint to the bare drywall, then the paint will be absorbed into the surface and will spoil your efforts.
Thin the Texture Compound
You can create wall texture material thinning the drywall compound.
- In order to thin the drywall compound add water to it in a ration of 4:1.
- Use a paint mixer attachment and 5-gallon bucket in order to mix the compound properly.
- Now blend the mixture properly until it attains a consistency of thin latex paint. Mix it thoroughly so that it is easy and smooth to roll on.
If you do not want to create texture material, you can buy premixed texture paint.
In order to prepare the paint for application, all you need to do is stir it thoroughly according to the manufacturer’s direction.
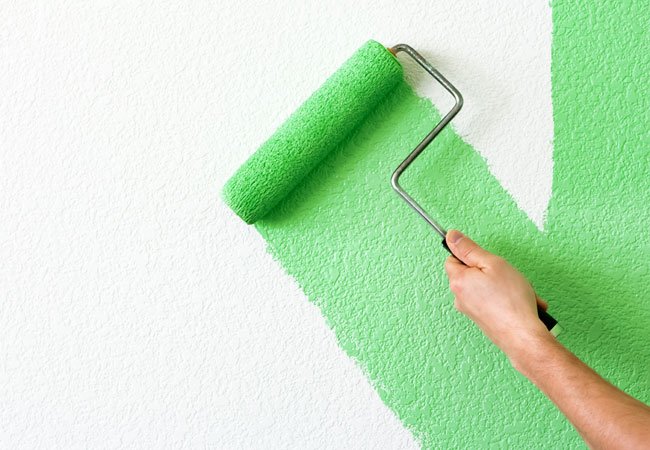
Roll Out the Wall Texture
Texturing comprises a two-part rolling process.
The first process involves the initial application, and the second one includes rolling over the material after it is partially dried.
Managing the right timing is the trickiest part of the wall texture process.
You should begin by filling a paint tray with texture paint or material.
Now dip the roller into the tray and then apply the wall texture over the ceiling surface of the wall.
It will produce a texture. If you want to create stippling, then you should use special paint roller covers.
PRO TIP
It is better to follow the product directions while using commercial texture paint. They might suggest a single coat.
Reach the Tough Areas Using a Brush
In order to cover the corners or edges, where rollers cannot reach, you should use a flat face paintbrush.
It will help you in completing the texturing and providing a smooth finish. Also the use of a paint edger can help you out.
Texture a Second Time
Once the applied texture material reaches the desired consistency, you should roll over again.
It will help in pulling up the material that is partially dried, which in turn will render a three-dimensional texture.
Use a flat face paintbrush on the surfaces where the roll cover can not reach.
Paint Homemade Texture
In case you are using drywall mud in order to create a smooth texture, then you should allow the surface to dry completely.
After drying, prime the surface and then paint it as desired.
In case you have to cover large areas using a wall texture, then it would be better to hire a professional painter. They use air-compressor texture sprayer in order to provide the finish.
They provide different effects like splatter, knock-down, and fog with the help of texture sprayers.
NOTE
You should never skip the primer. The mud of drywall is chalky, and it sucks the moisture out of the pain, which leads to inconsistent results. Therefore it is always a good idea to use a primer. It is cheap, and it is effective to seal the surface, which in turn provides finished coats of paint


