
How To Replace A Shower Handle
Updating your bathroom’s look doesn’t have to be expensive or complicated. If you’re wondering how to remove a shower handle and make a stylish change, one way to do it easily is by changing your shower handles.
These handles can be one solid piece or two separate ones, depending on your faucet style. The good news is that swapping them is a simple process – you just need to take off the old handles and put on the new ones. This small change can make a big difference in how your bathroom looks and feels.
How To Remove Shower Handle
Step 1: Turn Off the Water
- First things first, make sure to turn off the water supply. You can do this by either shutting off the main water supply line or using the specific valve dedicated to your shower if it’s accessible.
- After turning off the water supply, turn on the shower briefly to drain any remaining water. This is an important step to prevent any unexpected soaking if you accidentally turn the handle during the replacement.
- Typically, you’ll find the main water supply in your basement or outdoors. If it’s a wheel handle, turn it off by making two full clockwise turns. For lever handles, turn the lever a quarter turn until it’s perpendicular to the pipe, which prevents further turning.
Step 2: Protect the Drain
- Place an old cloth over the shower drain. This will catch any small parts that might fall while you’re working on the knob replacement. It serves the dual purpose of preventing the loss of tiny components and ensuring your drain doesn’t get clogged.
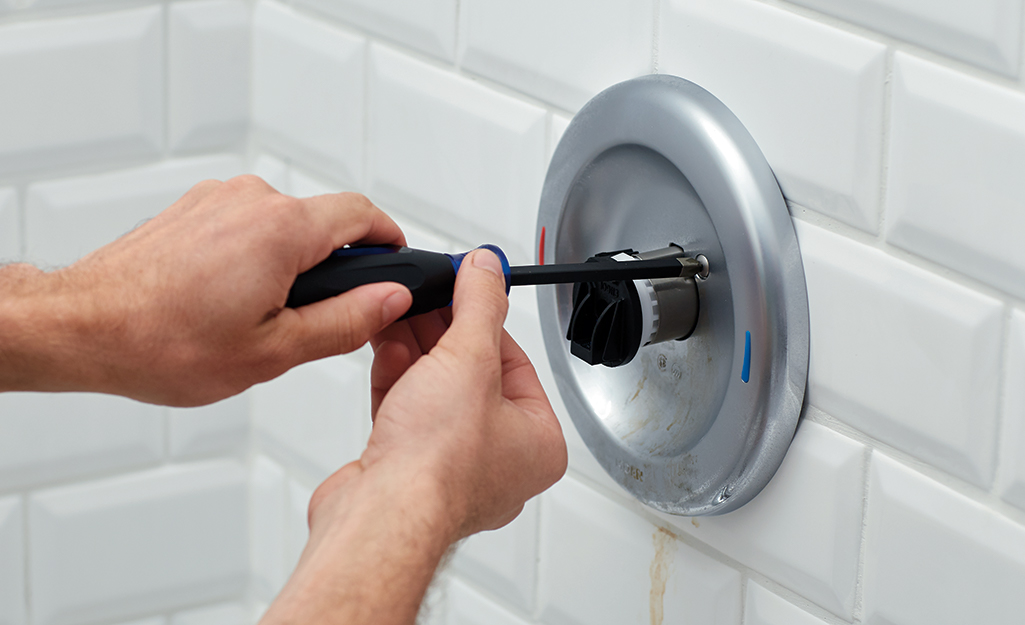
Step 3: Remove the Cover
- Look for a covered button on the underside of the handle. This button typically has the red and blue temperature symbols on it.
- Use a utility knife to lift and remove this covered button gently. It conceals a hole in the shower handle where the screw is located.
- If your handle doesn’t have a covered button, there’s no need to remove one. Just locate the small hole on the underside of your handle.
Step 4: Unfasten the Screw
- To remove the handle, you’ll need to use an Allen key. Insert the Allen key into the hole and turn it counterclockwise to loosen and remove the screw.
- As you turn the Allen key, the handle will start to loosen and can be pulled off.
- It’s a good idea to use the longer end of the Allen key, as the hole can be somewhat deep. Usually, a few full turns are sufficient to free the handle.
Step 5: Get a Replacement Handle
- Purchase a new handle that matches the size and brand of the old one. To ensure you get the right match, put the old handle and screw into a plastic bag and show them to a salesperson at a hardware or plumbing store.
- They will help you find faucet handles that work with your existing fixtures. If they don’t have handles from the same brand, they may suggest a universal faucet handle that can fit various fixtures.
- Opting for a new shower faucet with the same layout simplifies the replacement process without requiring extensive plumbing work.
- Shower faucet handles are made from different materials, including brass, plastic, zinc alloy, and chrome. Choose new handles that match other bathroom fixtures, like the showerhead and taps. Brass is durable but more expensive, while plastic is a cost-effective choice.
Step 6: Attach the New Handle
- Most new handles can be easily slid onto the existing fittings. However, some handle sets may include a spacer that needs to be inserted before attaching the new handle. Refer to the provided instructions for guidance.
Step 7: Secure with Screws
- Use a Phillips screwdriver to attach the screws to your new handle. The number of screws you need to use depends on the specific handle set you’ve chosen.
- These screws usually go in the centre of the new shower handle.
Step 8: Cover the Hole
- Slide the new cover over the hole containing the central screw. This cover often displays symbols for hot and cold or the brand logo.
- Ensure the cover is firmly in place and sits flat against the handle.
Step 9: Test the New Handle
- Gradually turn the water supply back on and move the handle to hot and cold positions. Check that the water works correctly and inspect for any leaks.
- If you notice a leak, remove the new cover and tighten the screws.
- It’s important to take your time when turning the water back on. For wheel-shaped handles, pause briefly after a half-turn before completing the full turn. For lever handles, make an eighth turn, wait for a few moments, and then return it to its original position parallel to the pipe.
With these steps, you can easily update your bathroom by replacing the shower handle, giving your bathroom a fresh look and a functional, stylish handle. Note, If you have a second knob, go through the same steps to replace it.
ALSO READ – Small Toilet Ideas – 50+ Best Toilet Designs
Things You’ll Need
- Used Cloth: Grab a piece of old fabric to catch any small parts that might fall during the replacement. This not only prevents you from losing anything but also keeps your drain from getting clogged.
- Screwdriver with a Flat Head: You’ll need this tool to remove the covered button and unscrew the old handle.
- Utility Knife: Use the utility knife to gently lift off the covered button, which hides the screw on the underside of the shower handle.
- Manual Handle Remover: This is used to remove the handle once the screw is out. It’s a helpful tool that makes the process easier.
- Hex Key: You’ll need this for turning the screw counterclockwise to remove the old handle. Use the longer end if the hole is deep.
- Phillips Head Screwdriver: This tool comes in handy when attaching the screws to the new handle. The number of screws you need will depend on the handle set you’ve chosen.
- Hammer: Sometimes, you might need a hammer to tap things into place gently. It’s not always necessary, but it’s good to have one on hand just in case.
- New Shower Handle Kit: Lastly, you’ll need the replacement handle and any accompanying parts from the new kit to complete the installation.
These tools and materials will help you change your shower handle and give your bathroom a fresh look.
How to Replace a Shower Faucet
Step 1 – Turn Off the Water
- Start by turning off the water supply.
- If there’s no separate bathroom cutoff valve, turn off the house’s main water supply.
- Open a lower-level faucet to release pressure in the pipes.
- Consider using a faucet with integral stops for easier maintenance.
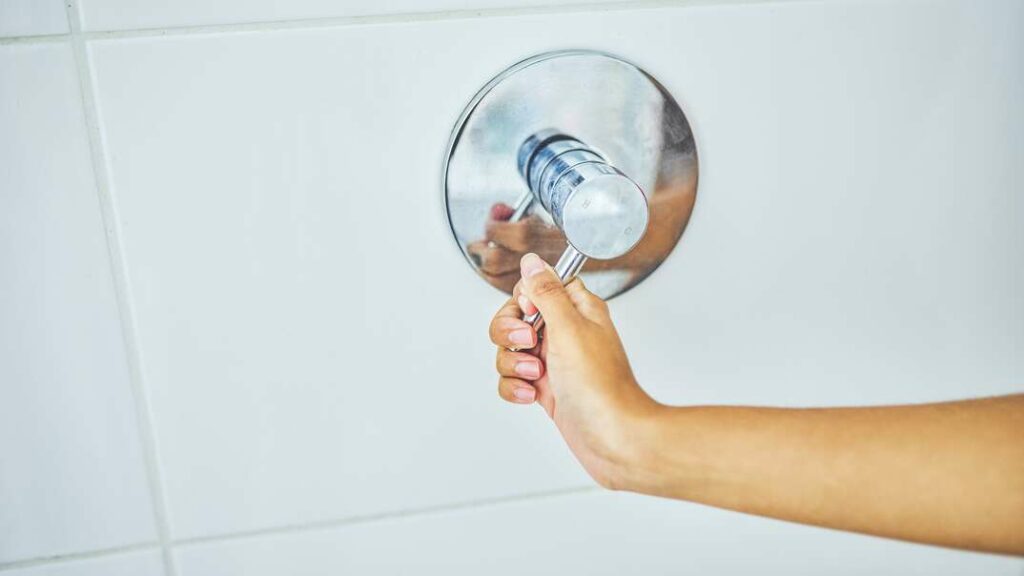
Step 2 – Remove the Old Trim
- Begin by removing the showerhead.
- Faucet handles have different removal methods.
- Some have a cover plate; others have a set screw.
- Keep disassembling until you reach the valve in the wall.
- Remove a tub spout if needed.
Step 3 – Replace the Old Valve and Choose a New One
- To install a new valve, remove the old one from inside the shower.
- Cut out a section of drywall on the opposite side of the wall.
- Drill pilot holes and cut a square section of drywall.
- Select a new valve with the right inlet and outlet channels.
- Consider your plumbing type, like PEX.
- Ensure the valve is correctly positioned and supported.
Step 4 – Solder the Pipes
- Attach female adapters to copper pipe ends.
- Solder the fittings using a torch and lead-free solder.
- Clean pipe ends and fittings thoroughly.
- Be cautious not to use too much solder.
- Alternatively, use solderless connectors.
Step 5 – Assemble the New Valve Section
- Choose a valve that matches your faucet requirements.
- Make sure it’s properly positioned and supported.
- Account for drywall and tile thickness.
- Follow the valve’s instructions for dimensions.
Step 6 – Install a Support and Test for Leaks
- Set the valve at the correct depth in the wall.
- Use existing support or install new ones.
- Test for leaks by screwing a test cap onto the valve.
- Check all connections when turning on the water.
- If there are no leaks, turn off the water, remove the caps, and patch the wall.
These main points provide an overview of each step in the process of replacing a shower faucet.
ALSO READ – How to Install a Shower Drain?
How To Remove Shower Handle Without Screws
When It’s A Low Arc Lever Style, Handle
If you’ve got a low arc lever-style shower handle, this method is for you. It’s a breeze, and you can do it in just two easy steps:
Step 1: Remove the Hot/Cold Button
First off, find that little hot/cold button on your shower handle. It’s usually a small button on the handle’s surface. Now, gently use a flathead screwdriver to pop it off. Be careful not to damage anything.
Once you’ve got that button out of the way, you’re all set for the next step.
Step 2: Get Rid of the Allen Key
Behind the hot/cold button, you’ll discover an Allen Key, not a regular screw. To take off the handle, you’ll need an Allen Wrench, which fits that Allen Key. Use the wrench to unscrew it.
Once that Allen Key is out, the handle should come off smoothly. That’s all there is to it.
These steps make it super simple to remove your shower handle, especially when there are no visible screws.
When It’s A Double Faucet Handle
If your shower sports a double faucet handle, don’t worry – removing it can be a straightforward process. This method involves four simple steps, ensuring you can successfully tackle this task.
Let’s dive in:
Step 1: Safety First
Our first priority is safety. Begin by turning off the water supply. This is a preventive measure to avoid any unexpected water surprises while you’re working. It only takes a moment and ensures a dry and hassle-free process.
Step 2: Handling the Base
Now, it’s time to work with the base to remove the handle. Start by holding the handle firmly and gently twisting the base in a counterclockwise direction. After a few turns, the base should release, and that’s it – you’ve successfully removed the handle. If your goal is to take out the cartridge as well, proceed to the next two steps; otherwise, you can skip them.
Step 3: Unscrewing the Centerpiece
For this step, you’ll need a Phillips head screwdriver. Use it to loosen and remove the centrepiece. This allows you to access the cartridge, which is our next target.
Step 4: Extracting the Cartridge
With the centrepiece removed, grab a pair of needle-nosed pliers. These pliers will be your handy tool for pulling out the white cartridge. It’s a straightforward process. With a gentle tug, the cartridge should come out without a hitch.
And there you have it – this method is quick, simple, and efficient. If it doesn’t provide the desired results, don’t worry; you can always explore the next method.
Recommendation
How to Manually Open Garage Door After A Power Outage
Best Follow Me Drones: A Comprehensive Guide and Tutorial
Lights in the Dark: How to Spot a Police Drone at Night
Choice Home Warranty | Is It Top Choice in Home Warranties with George Foreman Endorsement?
Why Are There Drones in the Sky at Night?
Conclusion
In conclusion, updating the look of your bathroom doesn’t have to be a complex or costly endeavour. One easy way to achieve a stylish transformation is by replacing your shower handles.
This straightforward process applies whether you have a single or double faucet handle.
By following the steps, including turning off the water, protecting the drain, and installing the new handle, you can quickly and affordably enhance the appearance and functionality of your bathroom.
So, if you’re looking for a simple upgrade, changing your shower handles can make a significant difference.
FAQs
Q: How do you take off a shower handle?
A: In case the screws are not readily in view, inspect the front section of the handle for a plug or cap. Use a flat-head screwdriver gently to extract it. If screws remain elusive, there’s a chance that your shower handle can be detached by giving it a twist.
Q: How do you remove a stripped shower knob screw?
A: In the initial approach, you have two choices. The first one is to utilize a screw extractor, preferably a small one that precisely fits the screw’s size. To get started, drill a pilot hole using a bit slightly smaller than the extractor. Afterwards, insert the extractor and manually rotate it counterclockwise, or if you prefer, you can use a drill with the reverse mode activated.
Q: How do you remove a sliding shower rail?
A: If your shower slider rail is attached to the wall with exposed screws, you can remove them by unscrewing them. However, in many cases, these screws are not readily visible. To access them, all you need to do is take off the cover that’s concealing these screws.
