
How To Change a Fuse In a Fuse Box: A Complete Guide
If your house was built in the mid-1960s or before, it might have a fuse box to control electricity in your home. Builders started using circuit breakers around that time, so you may need to know how to replace a fuse in a fuse box.
A fuse box has special fuses that are meant to stop working if there’s a problem with your electrical system.
Usually, just changing the fuse will fix the problem and get your lights and power back on. Here’s a guide to help you do this quickly and easily in case of an electrical issue.
What Does a Fuse Do?
Electrical fuses are like safety guards for your home’s electricity. They automatically turn off the power if something goes wrong.
These fuses have thin metal wires that can burn out or break, and this helps prevent fires and problems with other electrical things in your home.
There are three main reasons why a fuse might stop working:
Too much electricity
In older houses, the fuse boxes can’t handle as much electricity as the newer circuit breaker panels. When a circuit has too much power going through it, it can get too hot and make the fuse stop working.
This usually happens when you’re using a lot of appliances at the same time, have added extra lights, or are charging many devices.
Broken appliances
Sometimes, appliances in your home can have issues with their wiring connections, or they might just not work properly.
This can cause problems with the electricity in your home, and if the same fuse keeps stopping, you’ll need to figure out which appliance is causing the trouble.
Short circuits
When one electrical path touches another one, it’s called a short circuit. This is dangerous and can even start a fire.
It’s important to be careful if you see any wires or appliances that are not working correctly because they can be a risk to you and your home.
Signs You Need to Replace a Fuse
Sometimes, you might face an electrical issue in your home, and the first sign is a loss of power. It could be the whole house or just one part of it. Here’s how to spot when a fuse needs changing:
1. Appliances Don’t Work: If you try to use an appliance, like a blender or a toaster, and it simply won’t start, it’s a hint that a fuse might be the culprit.
2. Lights Stay Off: When you flick a light switch, but the lights don’t come on, that’s another clue that a fuse might be the problem.
3. Total Electrical Blackout: If nothing electrical is working in your home, you might need to replace the main fuse. But most of the time, it’s the smaller fuses that control specific areas or circuits in your home.
Now, here’s the detective part:
Inspecting the Fuse Box
To find out if a fuse has blown, you can take a closer look at your fuse box.
Here’s what to look for:
1. Cloudy or Burnt Glass: If you see a fuse with a cloudy, burnt, or darkened centre glass piece, that’s a sign that the fuse has blown.
2. Missing or Broken Metal: In some cases, the glass might look clear, but if the metal piece inside is either missing or visibly broken, it means the fuse needs to be replaced.
By being a bit of a detective and checking your fuse box, you can spot the issue and fix it. It’s a handy skill to have for maintaining your home’s electrical system.
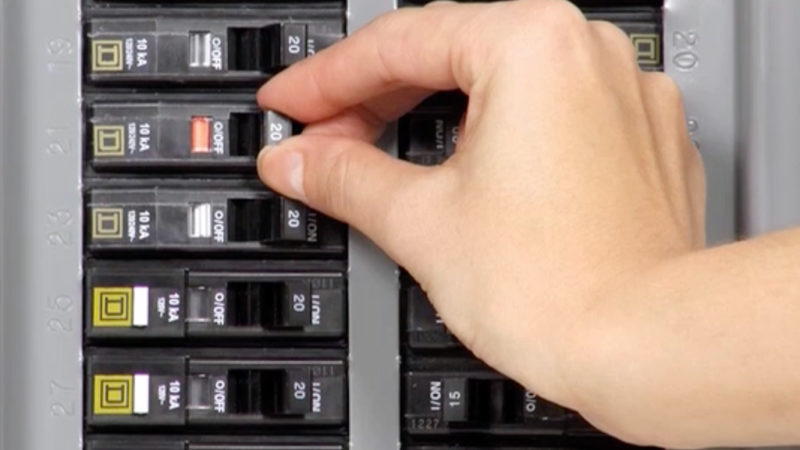
How To Change a Fuse In a Fuse Box
Changing a fuse in your fuse box is a simple process. If you find that a fuse often goes out, multiple fuses blow, or even the main fuse occasionally, it might be a good idea to have an electrician check if you need to upgrade to a circuit breaker switch panel or switch to a 200-amp service.
Here’s a step-by-step guide to help you for how to change a fuse in a fuse box:
1. Find the Fuse Box: Look around your home for a metal box or wooden panel with round plugs containing glass circles in the centre.
You can find the fuse box in various places like the basement, garage, attic, or behind a small metal door on an interior wall. Some fuse panels without a box might be in the basement, garage, or attic.
2. Turn Off Appliances and Lights: Check which areas in your home are affected by the electrical issue. Identify the lights and outlets that aren’t working, unplug items from the outlets, or turn them off.
3. Turn Off the Power: How you turn off the main power depends on the type of fuse panel you have. Look for a large switch and flip it from the “on” to the “off” position.
If you have a metal handle connected to a square or rectangular box instead of a switch, grasp the handle, pull the box out, and set it aside. This disconnects the main power.
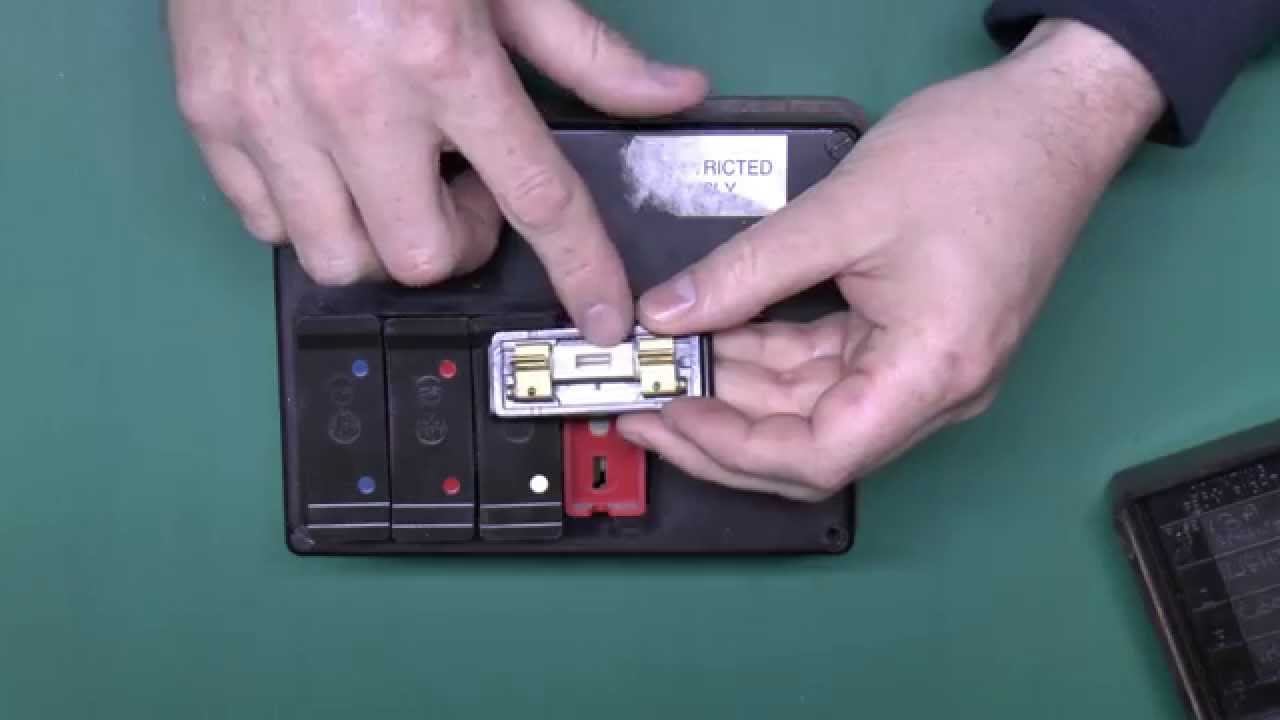
4. Identify the Blown Fuse: If you’re fortunate, the blown fuse might have a label telling you which circuit it protects.
If there’s no label, look at the centre of each fuse’s glass for cloudiness, scorch marks, or a missing or broken metal piece.
It may take some patience to locate the blown fuse. Once found, use a rubber-gloved hand to twist it counterclockwise and remove it from the panel.
If you have a multimeter, check the fuse for continuity by touching one probe to the tip and the other to the metal screw threads.
If there’s no continuity or the ohm reading is infinite or “OL,” the fuse needs replacing.
If the entire house has lost power and you can’t identify a blown fuse, it might be the main fuse or a 240V fuse that’s causing the problem.
Use a plastic fuse puller tool to remove the cartridge fuse from the fuse block you set aside earlier, or locate another handle connected to a fuse block labelled for the main fuse or 240V and remove that fuse in the same way.
Use the multimeter to check for continuity or ohms by touching the leads on the opposing ends of the fuse. If there’s no continuity, the fuse is blown.
5. Replace the Blown Fuse: To replace the blown fuse, find the exact replacement for it. Each fuse has a specific type and capacity.
If you’re dealing with round twist-out fuses, twist the new one clockwise into the empty spot.
Make sure it’s the correct type by checking if it’s an S-type or T-type and matching the amp rating listed on its exterior.
For cartridge-type fuses, identify and replace them by matching the amp rating number with the fuse’s physical size, then push it into place within the fuse block.
Finally, return the block to the fuse panel by sliding it firmly into place.
Fuse Types:
- Cartridge fuses: These cylindrical fuses have metal caps at both ends and a longer glass middle. They’re commonly used in 240-volt household circuits and often come in 60-amp main fuses and 30 or 40-amp circuit fuses.
- Edison-base fuses (Type-T): These screw-in fuses have a light bulb-style base and are used in household circuits that can handle a maximum of 125 volts. Their maximum rating is 30 amps.
- Type-S (tamper-proof or rejection-base fuses): These two-part fuses have a screw-in part that attaches to an adapter connected to an Edison base. The threading is unique for each fuse amperage, preventing the attachment of a fuse with the wrong amperage capacity.
Fuse Size: Always replace fuses with the same ampere rating. The ampere rating is usually printed on the fuses for easy reference.
Installing a higher capacity fuse can overheat and damage the circuit wiring appliances and pose a fire risk.
6. Verify the New Fuse: Once the new fuse is in place, turn the main power back on by flipping the switch to the “on” position or reinserting the main fuse block.
Check the lights and appliances in the affected areas of your home to see if they’re working.
7. Troubleshoot: If the newly replaced fuse blows immediately after restoring power, it may indicate a deeper issue within your electrical system.
In such cases, it’s advisable to seek the assistance of an experienced electrician.
If the new fuse blows when specific lights or appliances are turned on, the problem may be with one of those items rather than the fuse itself.
Replace the fuse once more and then turn on one light or device at a time. If the fuse blows when a particular item is operating, the issue likely lies within that appliance.
If no single item causes the fuse to blow, it might be due to overloading the circuit, so you’ll need to reduce the electrical load on that circuit to prevent further blown fuses.
Do Fuse Boxes Need to Be Replaced?
If your home still has a fuse box, it’s probably quite old, likely over 50 years. As time goes on, the fuses and circuits in these old systems can wear out.
This can make your home more at risk for fires and can harm your electrical wiring and appliances.
To make your home safer and more up-to-date, you might want to think about replacing that old fuse box with a modern circuit breaker panel.
This upgrade can make your electrical system safer and more efficient, giving you peace of mind for your home and family.
Why the Cost to Replace a Fuse Box with a Breaker Panel is Worth It
Switching from a fuse box to a circuit breaker panel can cost you between $1,400 and $4,000.
The exact price depends on your specific electrical needs and how much of your home‘s wiring needs to be updated.
There are two main reasons why this switch is a good idea:
Safer Electrical System: Modern circuit breakers respond faster than fuses, which makes your home less likely to experience fires or electrical accidents that could hurt you or your family.
More Electrical Power: Circuit breaker panels can handle more electrical power, which is essential for today’s homes with lots of appliances and electronic devices that need charging.
This upgrade ensures that your home’s electrical system can meet modern demands, keeping everything running smoothly.
Recommendation
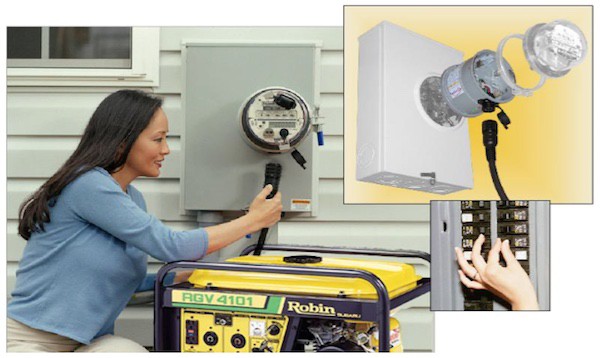
How to Hook Up a Generator to Your House
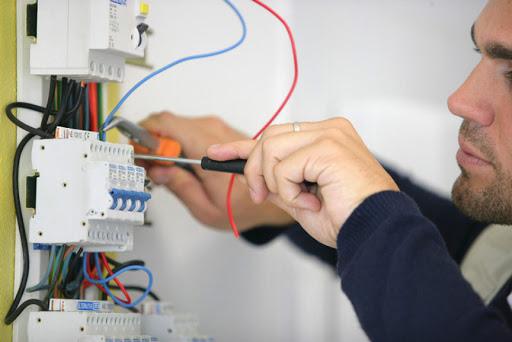
How to Replace Circuit Breaker?
How to Remove a Circuit Breaker Safely?
Conclusion
In conclusion, if your home was built in the mid-1960s or earlier and still uses a fuse box for electrical control, understand how to change a fuse in a fuse box.
Fuses work like protective guards for your electrical system, automatically cutting off power when issues like electrical overload, faulty appliances, or short circuits occur.
Identifying signs of a blown fuse, such as appliances and lights not working, is the initial step.
To ensure a safe and efficient electrical system, regularly inspecting the fuse box is vital.
However, if fuse problems happen often, it might be a good idea to think about upgrading to a circuit breaker panel, which can cost between $1,400 and $4,000.
This change not only boosts safety but also accommodates the growing electrical needs of modern homes, making it a valuable investment in your home’s well-being.
FAQs
Q: Can I replace a fuse myself?
A: Swapping out a fuse is a DIY home project that’s quite manageable with the right knowledge and a dose of electrical home safety awareness. When dealing with a fuse box in your home, it’s wise to be proactive and get acquainted with your electrical panel and the specific fuses it uses.
Q: Do you need an electrician to change a fuse in the fuse box?
A: These situations can pose significant risks, making it advisable to have a certified electrician address the problem. Typically, the problem arises from a blown fuse or a tripped circuit due to an excess of electrical current flowing through the wires. The fuse or breaker functions automatically to halt the current, preventing wire overheating and potential fire hazards.
Q: How do you know if a fuse is blown in a fuse box?
A: Take out the fuse from its slot. Occasionally, you might require a small screwdriver to unfasten the fuse holder cap. Inspect the fuse wire closely. If you spot an evident break in the wire or notice a dark or metallic streak inside the glass, it indicates that the fuse has blown and should be substituted.
Q: How much does it cost to replace a fuse?
A: If you’ve only blown a fuse, there’s usually no need to replace the entire box; you just have to swap out the fuse itself. Each individual fuse usually costs between $3 and $10.