
How To Install A Vessel Sink

Vessel sink that is placed over the countertop in the bathroom gives a unique and luxurious touch, even a simple interior bathroom. Vessel sink installation is a super easy task, and you can do it without any professional help.
The countertop of the vanity can be of tile, laminate, granite, or any type of surface. The best part of a vessel sink is that you can even install and create a sink vanity by converting a table, dresser, or any furniture that gives your bathroom a completely new look.
Learn how to install the vessel sink on your own with the simple and easy installation steps.
Important Things To Know
In order to install the vessel sink, you need to drill holes on the countertop or vanity top for faucet and drain, if you are installing the deck-mount type vessel sink. However, you can install a wall-mount type vessel sink faucet.
You can buy the countertop with a precut faucet and drain holes or cut yourself using a drill or hole saw. In case you have marble, stone, or engineered stone countertop, it is better to cut holes by taking the help of a countertop fabricator. However, a deck-mount sink faucet is easier to do installations even before the vessel is in place.
Also, before starting the installation, you have to make sure that first to do drain fittings correctly. This ensures that fittings work as the drain opening for the vessel sink and anchoring mechanism, which helps in holding the sink at the right place.
If you bought the vessel sink that has built-in overflow passage, then you have to ensure that the drain fittings should also have overflow features. Similarly, vessel sinks with no built-in overflow feature do not require drains with overflow features.
PRO TIP
Remember that if you are installing the glass type vessel sink, you have to use a mounting ring, which will ensure that the vessel should remain in place.
Tools And Material Required
| Rag Tongue-and-groove plier Hacksaw Plumber’s Putty Tailpiece and Drain Fitting Pipe Joint Compound Drain-trap Assembly |
Steps To Install Vessel Sink
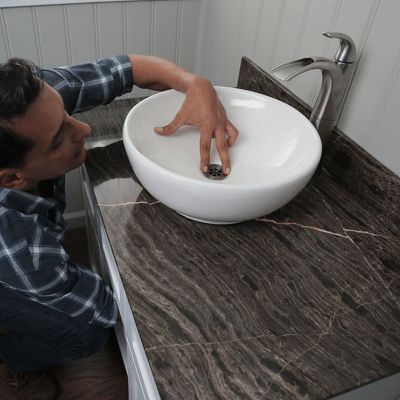
Step 1: Decide Position Of The Sink
- Set the position of the vessel sink on the vanity top or countertop. There is also a vessel sink mounting ring or gasket that is placed between the countertop and vessel sink, helps in holding the sink in the right place.
- You can place the mounting ring where the drain opening and place vessel sink over the ring.
- Some other types of vessel sink may require silicone caulk for holding the sink at the right place and seal vessel sink on the vanity top.
Step 2: Insert Tailpiece And Drain Flange
- Apply a layer of plumber’s putty on the bottom surface for inserting the drain flange for drain fitting; however, if drain fitting comes with a rubber gasket or foam, you have to place it against the bottom area of the drain flange.
- Now insert the end of the tailpiece of the sink drain fitting into the drain opening as well as through a cut-out in vanity top or countertop.
Step 3: Secure Tailpiece
- Now it’s time to apply a layer of pipe-joint compound working from below the vessel sink and slide the rubber seal around the tailpiece as well as to the cut-out in the countertop, as far as the compound goes.
- Now thread friction rings on the tailpiece fitting that is followed by mounting nut.
- With your hands, tighten the mounting nut as much as you can and then use the tongue-and-groove plier to tighten the mounting nuts further.
PRO TIP
Make sure not to over tighten the nuts otherwise, and it will damage your vessel sink.
Step 4: Completely Install Drain Assembly
- Attach a P-trap drain tailpiece with the washer and slip nuts just to make a snug temporarily.
- Now install the trap-arm between branch drain-pipe and P-trap into the floor or wall with a washer or slip nuts.
- Make sure to keep the trap arm in a downward slope to the drain line to make the easy flow of water.
- In drain configuration, you need to locate the drain opening, and you may require installing a tailpiece extension by cutting trap arms using a hacksaw and making it fit appropriately.
Make sure to double check all the fittings of drain parts and tighten all the washers and slip nuts by your hands, or you can also use tongue-and-groove pliers. Always remember not to over-tighten the washers and nuts, or your vessel sink may get damaged.
Step 5: Check Leaks
- Now it’s time to test and check the vessel sink system leaks.
- Turn on the faucet and check leaks by running water.
- If you see any leaks near the nut, then fix it by slightly tightening the slip nuts.
- However, if you find the leaks at the bottom of the sink or the rubber seal, the installation is not done properly, and you have to disassemble drain fitting and start installing it again.
Make sure to properly seal the drain, opening appropriately, and tighten all the fittings.


